...
Knee pain

Why Your Knee Pain Is Probably NOT a Strength Problem

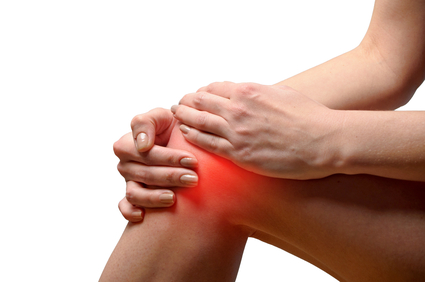
Your knee may not be fragile — it may be overloaded.

Knee pain is commonly interpreted as a sign of weakness. But in many cases, the issue is not insufficient strength — it is a mismatch between load and capacity.

Excess body weight, for example, significantly increases mechanical stress on the knee joint. Research suggests that obesity can double or even triple the risk of developing knee osteoarthritis. Approximately 25% of knee pain in older adults is associated with a high BMI (Silverwood et al., 2015).

Previous knee injuries, age-related changes, and sex-specific factors may also increase the likelihood of knee pain (Kim, 2024).

Yet even with these known risk factors, strength alone rarely tells the full story.


The Common Belief

The standard assumption is straightforward:

If the knee hurts, it must be weak.

This belief often leads to predictable advice:

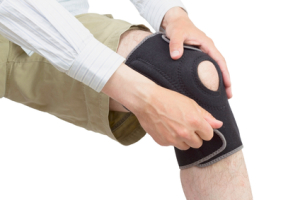
✔ Strengthen the glutes
✔ Strengthen the quadriceps
✔ Perform corrective exercises

Sometimes this works.
But pain is far more complex than the traditional “pain equals weakness” narrative.

But many individuals diligently perform strengthening exercises and continue to experience pain.

Why?

Because weakness is often not the primary driver.


What Actually Might Be Happening

In many cases, knee pain is better understood through three interacting mechanisms:

✔ Load tolerance
✔ Tissue sensitivity
✔ Capacity vs demand


Load Tolerance: The Missing Variable

Load tolerance describes the amount and pattern of mechanical stress that a joint can handle before tissues become irritated.

Knee pain frequently emerges when:

👉 Joint loading chronically exceeds tissue capacity
👉 Loading is insufficient to maintain tissue health

Yes — both overloading AND underloading can be problematic.

Cartilage, tendons, and connective tissues require moderate, cyclic loading to maintain homeostasis (Jahn et al., 2024). There is a physiological “Goldilocks zone” of loading — not too much, not too little.

Crucially, this zone is dynamic.

A load that is harmless for a trained individual may overwhelm someone who is deconditioned.

Obesity further complicates this picture by increasing:

✔ Muscle forces
✔ Ligament stress
✔ Cartilage contact stress

All of which push tissues closer to their mechanical limits (Adouni et al., 2024; Chen et al., 2020).

Well-dosed exercise does not simply “strengthen muscles.” It increases tissue capacity, allowing the same loads to become more tolerable (Logerstedt et al., 2021).


Tissue Sensitivity & Nervous System Involvement

Pain is not purely a structural phenomenon.
Modern pain science increasingly highlights the role of nervous system sensitivity.

Repeated nociceptive input can amplify processing within the nervous system. This means sensations that were once tolerated may become painful, even without progressive tissue damage.

Research suggests that approximately 20–30% of individuals with knee osteoarthritis exhibit features of pain sensitization (Arendt-Nielsen et al., 2010; Fingleton et al., 2015).

In this state:

✔ Smaller load spikes can trigger pain
✔ Movement patterns may change
✔ Activity avoidance may increase

Ironically, excessive protection can further reduce capacity, reinforcing the pain cycle.

This is where graded loading, education, and — when appropriate — interdisciplinary management become critical.


Capacity vs Demand

Strong individuals develop knee pain.

Elite athletes develop knee pain.

Pain does not automatically equal weakness or failure.

Instead, pain often reflects a temporary imbalance between capacity and demand.

Strength training remains important — but not as a magical cure.
When applied correctly, strength training becomes a powerful capacity-building tool

Strength is:

✔ A capacity builder
✔ A load buffer
✔ A resilience enhancer

Not a universal explanation.


Why Strength Alone Often Fails

If load tolerance and tissue sensitivity are primary drivers…

Then isolated exercises like clamshells or band work rarely solve the problem in isolation.

Strength must exist inside a broader framework of:

✔ Load management
✔ Progressive adaptation
✔ Movement variability
✔ Nervous system considerations


Practical Examples

Runner A vs Runner B

Runner A drastically increases training volume with minimal preparation. Pain emerges. Sensitivity rises. Reinjury cycles begin.

Runner B progresses load methodically. Capacity builds. Symptoms remain controlled.

The difference is not discipline — it is dosage.


Sedentary Individual A vs Individual B

Individual A abruptly introduces high training frequency and intensity.

Individual B introduces gradual loading, reduced volume, and staged progression.

Again, the difference is load management — not motivation.


Rest-Only Strategy vs Progressive Strategy

Rest often reduces symptoms temporarily.

But without capacity rebuilding, pain frequently returns upon resumption of activity.


Final Reframe (Knee Pain)

Knee pain is often a capacity conversation, not a strength diagnosis.

Your knee is rarely “weak” in isolation.

More often, it is:

👉 Underprepared
👉 Underloaded
👉 Overloaded
👉 Sensitized
👉 Mismanaged

Strength training is a powerful tool.
But selecting the right training approach matters more than most people realize.

But it is a tool — not the explanation.

Disclaimer

This article is intended for educational purposes only and does not constitute medical advice, diagnosis, or treatment. Individual conditions vary, and persistent or worsening symptoms should be evaluated by a qualified healthcare professional. Always consult your physician before making changes to exercise or rehabilitation programs.


Further Reading / Evidence Sources

Silverwood, V., Blagojevic-Bucknall, M., Jinks, C., Jordan, J., Protheroe, J., & Jordan, K. (2015). Current evidence on risk factors for knee osteoarthritis in older adults: A systematic review and meta-analysis. Osteoarthritis and Cartilage, 23(4), 507–515. https://doi.org/10.1016/j.joca.2014.11.019

Kim, T. (2024). Factors associated with predicting knee pain using knee X-ray and personal factors: A multivariate logistic regression and XGBoost model analysis from the Nationwide Korean Database (KNHANES). PLOS ONE, 19. https://doi.org/10.1371/journal.pone.0314789

Jahn, J., Ehlen, Q., & Huang, C. (2024). Finding the Goldilocks Zone of Mechanical Loading: A Comprehensive Review of Mechanical Loading in the Prevention and Treatment of Knee Osteoarthritis. Bioengineering, 11. https://doi.org/10.3390/bioengineering11020110

Chen, L., Zheng, J., Li, G., et al. (2020). Pathogenesis and clinical management of obesity-related knee osteoarthritis: Impact of mechanical loading. Journal of Orthopaedic Translation, 24, 66–75. https://doi.org/10.1016/j.jot.2020.05.001

Adouni, M., Aydelik, H., Faisal, T., & Hajji, R. (2024). The effect of body weight on the knee joint biomechanics based on subject-specific finite element-musculoskeletal approach. Scientific Reports, 14. https://doi.org/10.1038/s41598-024-63745-x

Logerstedt, D., Ebert, J., MacLeod, T., Heiderscheit, B., Gabbett, T., & Eckenrode, B. (2021). Effects of and Response to Mechanical Loading on the Knee. Sports Medicine, 52, 201–235. https://doi.org/10.1007/s40279-021-01579-7

Arendt-Nielsen, L., Nie, H., Laursen, M. B., et al. (2010). Sensitization in patients with painful knee osteoarthritis. Pain, 149(3), 573–581. https://doi.org/10.1016/j.pain.2010.04.003

Fingleton, C., Smart, K., Moloney, N., Fullen, B., & Doody, C. (2015). Pain sensitization in people with knee osteoarthritis: A systematic review and meta-analysis. Osteoarthritis and Cartilage, 23(7), 1043–1056. https://doi.org/10.1016/j.joca.2015.02.163

The Ergonomic Variable

The Longevity Protocol: A Systems Approach to Winter Sports Injury Prevention

Field Notes: Testing Ergonomics, Traction, and Impact Mitigation on the "Ice Coast"

Introduction: The Aging Athlete’s Dilemma As a studio owner and rehab specialist, I preach that “movement is medicine,” but we must acknowledge that the margin for error shrinks as we age. For the middle-aged population, the goal of winter sports shifts from pure performance to performance with preservation.

This weekend, I conducted a field test on the East Coast under classic “freeze-thaw” conditions—warm temps followed by a hard freeze. This created a treacherous, icy surface that served as the perfect laboratory to test a comprehensive injury prevention system: Ergonomics (Bindings), Traction (Board), and Impact Mitigation (Protective Armor).

The Ergonomic Variable


1. The Ergonomic Variable: Reducing the “Flexion Moment” My first focus was the lumbar spine. Traditional snowboarding requires deep, repeated lumbar flexion (bending over) to ratchet bindings, often 20+ times a day. For a client with a history of disc issues, this is the mechanism of injury.

I tested the Bent Metal Supermatic “drop-in” system.

The Learning Curve: While the engagement mechanism wasn’t instant magic—it requires a specific motor pattern that takes practice—the biomechanical payoff was undeniable.

The Clinical Result: By eliminating the need to sit on cold snow or bend repeatedly at the waist, I maintained a neutral spine throughout the day. The cumulative fatigue on the posterior chain was significantly lower than with traditional setups.

2. The Environmental Variable: Managing “Ice Coast” Risk Today’s conditions were unforgiving: a solid sheet of ice. In rehab terms, we call this a “high-consequence environment.” A slip here isn’t just a fall; it’s a potential fracture.

The Result: Unlike traditional edges that wash out on micro-ice, this profile increases the contact surface area, effectively “biting” into the hardpack. This mechanical grip reduces the isometric strain on the lower leg stabilizers (peroneals) and drastically lowers the probability of an uncontrolled fall.

3. Impact Mitigation: The Case for Prophylactic Armor Perhaps the most critical component of this test was the integration of a full protective layer: Helmet, Wrist Guards, Hip Pads, and Knee Pads.

In the fitness industry, we often neglect “trauma prevention” in favor of “strength training,” but on ice, gravity is undefeated. 

The Pelvic Complex: Falling on ice generates massive impact forces through the greater trochanter and coccyx. The hip protection served to dissipate this force, preventing deep tissue contusions or bursitis that could sideline a client for weeks.

Distal Protection: Wrist guards mitigated the risk of FOOSH (Fall On Outstretched Hand) injuries—the #1 snowboard injury—while knee pads protected the patella during the inevitable learning curve of the new binding system.

Conclusion: Equipment as a Medical Intervention My field test confirmed that for the 35+ demographic, gear choice is not about style—it is a risk management strategy.

The Bindings preserve the back.

The Board prevents the fall.

The Armor mitigates the damage when the fall happens.

For my clients looking to stay active in high-risk sports, I can no longer recommend just “going out there.” I recommend a systems approach to gear that prioritizes longevity over everything else.

Young woman having knee pain

Case study Melinda – Running a Marathon After Knee Replacement


Situation:

Melinda (name changed) had a knee replacement after struggling with arthritis for the past 15 to 20 years in her right knee. She had been a runner for a couple of years prior to coming to me.

Changes to her running gait and an aggressive strengthening program reduced the pain and enable her to run 4 marathons, several half marathons, a Dopey Challenge, etc.

Even though, changes to her running gait enabled us to continue running 4 about 4 to 5 years before the surgery was inevitable.


Complete Knee Replacement Surgery August


Melinda chose a surgeon who used a minimally invasive procedure that would avoid cutting the muscle tissue.


Post-surgery progress: for the first 3 weeks after surgery Melinda had to focus on regaining range of motion and minimizing the swelling. Driving was not possible yet, and physical therapy was done in-home.

After 3 weeks she started to work with me three days a week again for 60 minutes, as well as with a physical therapist 2 days a week.

After having a conversation with the physical therapist, I decided that the training for her knee replacement recovery needed to focus on several important areas:

  • An increase of range of motion of the knee in regards to flexion to 120-130 degrees as well extension to 0-1 degrees.
  • Improving the proprioceptive reflexes in the surgical leg. Every surgery, and especially replacement surgeries, destroy proprioceptive receptors in the affected tissue. Regaining those abilities is crucial to avoid further injuries in other joints above and below or on the other leg
  • Regaining the strength in the surgical leg as well as overcoming the mental hurdle of using that leg


Training

For the first 5 to 6 weeks off the training, we slowly increased the use of her leg primarily with bilateral exercises due to her inability to fully load the surgical leg.  As we progressed we increasingly focused on unilateral exercises closed kinetic chain exercises in order to minimize the deficit within the surgical leg.

Once a normal gait pattern was established again and the swelling caused by exercise was minimal, we started to reintroduce running patterns into the training.

These running patterns consisted of high knee running, high heels, side shuffle, heel to ball rolling patterns while walking, as well as focusing on Cross diagonal moving patterns with arms and legs.

Upon being able to execute these movements pain-free for a while we started to introduce run/walking back into the training program.

The duration of the run started between 20 and 30 seconds, while the walking interval was 60 seconds to 2 minutes. Even though her capability was higher than that, the goal was to be minimally fatigue only when running.

Throughout this phase, the strength training started to also slowly contain easy plyometric exercises.

Melinda completed her first half marathon after the surgery in the middle of November. She then proceeded to do the Dopey challenge in the beginning of January 2018. The Dopey challenge consists of a 5K, and 10K, 1/2 Marathon, as well as a Marathon on consecutive days.

Even though the healing process in the knee and the surrounding tissue had been going well, I opposed both race events.

The reason for my recommendation was that she had not built up the training mileage prior to the race and the likelihood of injury was too big. The concerned areas for injuries were not the actual knee replacement side, but the hip, the back, as well as the hip or the knee on the other leg.

Despite having worked hard to minimize the deficit on the right leg come on I did not feel confident in her ability to maintain an even running gait throughout the various races.

After the race series, she had only minimal swelling in the surgical leg which was to be expected and not all to worrying.  The problem was though, that she had a strong IT band issue on the left side as well as potential bursitis over the left trochanter major.

The recovery from those injuries took about 4 weeks and included absolutely no running, soft tissue manipulation by her and her massage therapist, and very careful leg training in order to minimize the impact on the site of injury.

We are now at week 5 after the race series and we will begin running again this week with a short distance of 1-2 miles at the most.


Outlook

To minimize further injuries the reintroduction into running will have to be slow. Both legs need to be equally strong and her running movement patterns need to be consistent even when fatigued.

Her strength training will continue to focus on movement education, proprioceptive training, light plyometrics, consistent strength training with a heavy focus on single leg training and hip stabilization.

Her run training will include running drills and a slow increase in her mileage. The goal will be to run a Half Marathon in May/June and a full Marathon end of October.


Conclusion


Running with a total knee replacement is perfectly possible if handled responsibly. Above you see the approach I have used. You cannot control the client and you can see that being too hasty to get back to race events led to consequences.

Having said that, her tenacity and willingness to work hard in physical therapy and personal training led to an incredibly fast recovery. It is amazing what you can accomplish with an exceptional work ethic.

Her physician had approved of her running marathons again.

Thoughts On Wearing a Brace

Todays blog is provided by Troy Groce. He is one of my personal trainers and specializes in a corrective approach to training. He is sharing some thoughts on rushing towards braces whenever something seems to be uncomfortable:

A brace is not always the right way to go

Our society has become brace happy.  At the first sign of discomfort people brace joints more often than they should.  Bracing may provide temporary relief, but it can pose more extensive long term problems.  However, bracing is appropriate when a joint is significantly injured or unstable and/or when any excessive additional movement can cause further injury. Knowing the difference between discomfort and acute pain is essential.  Significant acute pain should be diagnosed by a medical practitioner.

Bracing at the first sign of discomfort and restricting movement can actually slow down the healing process. Movement at a joint when it’s mildly injured brings blood flow to help in the recovery process. Bracing weakens the stabilizing muscles and connective tissue around the joint. Wearing a brace too long causes the joint to grow weaker, possibly resulting in a more significant injury to the specific joint or dysfunction in other related joints.  The root issue of most non-traumatic joint pain is usually associated with improper movement patterns that can be simply addressed with a proper corrective exercise program.

I am looking forward to helping you with your goals,

Troy Groce


How Low Can You Go – Or What Is A Good Squat Range?

In one of my recent Facebook and Google+ posts I talked about the importance of maintaining spinal integrity during a squat. A lot personal training clients come to us had back, knee or hip injuries before.

For a long time there was the believe that you should not squat below a 90° angle in the knee. This has changed in the past couple of years and the fitness industry has encouraged people to squat lower.

There have been terrible consequences. Without really knowing how to perform a squat safely, or knowing if they have the physical capabilities people have driven their butt to the floor and are getting injured. I will give you an example from Youtube. The stuff people put there is fantastic learning material on how not to do it!

Start watching at 35s. You only need to watch the first squat. It is bad enough.

Now, despite the fact that there is about everything wrong with this squat, he goes into hyperlordosis, and proceeds to have a terrible butt wink, and then comes up with terrible form, we focus on the hip tucking under!

Todays blog is only about the butt wink!

So what in the world is that. The butt wink is the part when your hip tucks under and you start rounding your back. If you look at the two photos below you will see the difference between a proper bodyweight squat and one where I am going too low.

If done correctly the back should maintain it’s natural S-curve.

bodyweight squat with S-Curve maintained

The red line I used, helps to clarify how spinal integrity is maintained. If you are looking now at the second picture you will see that I am going lower, since we all know, lower is better! Well, maybe not:

Bodyweight squat without spinal integrity

My butt is tucking under. For several reasons I am physically not capable of going that low without compromising my back. Those reasons can be tight muscles, structural hip problems, pain, you name it. The pressure on those lumbar discs is exponentially higher in the lower picture. I might not get hurt doing it once or twice or twenty times but with more load or repetition I could get severely injured and risk a permanent impairment. If you want to squat better reduce the range of motion. Don’t get me wrong, I am all for a full range squat, if you can perform it safely without getting injured.

Here is how a squat, in this case a front squat should look like. Don’t get me wrong. This is not perfect. For one I am not happy with my head positioning, but that is a topic for another time. The lumbar spines integrity is maintained. I am minimizing shearing forces on the disc.

I hope this has been helpful to you. Happy squatting!

Your comments and questions are always welcome.

Have a wonderful day,

Michael

What to do when you sprain your ankle?

Ankle sprains are pretty common. Many of us have had one and if you had one, there is a good chance you will have or had a second one. You step off the curb, step wrong just for one second, and bang, your ankle goes out of under you.

Inversion ankle sprain with strong hematoma
Not a pretty sight!

What is an ankle sprain?

The most common ankle sprain is the inversion ankle sprain. The sprain is graded into 3 different categories.

  • Category one leads to some stretching or minor tearing of the ligamentous fibers. The joint stability is usually not compromised. You might feel the joint to be a little bit more stiff, but usually there is not a lot of swelling, and only mild pain.
  • The second degree sprain is a different matter. The joint is definitely more unstable, there is more tearing and separation of ligamentous fibers.
  • The third grade involves a total rupture of the ligament and severe instability of the joint, profuse swelling and severe pain. A third degree sprain can be accompanied by other ligament or structural injuries  in the joint. and surgery might be necessary.

What to do at first?

RICE – rest it, ice it, compress it and elevate it is probably the most important thing to do in an ankle injury initially. Depending on the severity of the sprain you might have to have the ankle immobilized for a couple of weeks, or even have surgery (usually 3rd degree sprain).

What to do later?

Here comes my disclaimer, I am not a physician and don’t try to be one. This advice is not for you to treat yourself but be a little bit better informed. It certainly does not replace your healthcare professional.

In the beginning you will have to scale back on vigorous training (that is at least what the textbook says). Well, you have other body parts you can work out vigorously without compromising joint integrity. You will have to lay off of running, jumping or some leg exercises but don’t think you can get out of working out once you are past the first 3-5 days. Once you are allowed to be weight bearing again you can even try some aquatic exercises which allow you to be partially weight bearing, and you have some compression from the water on the joint. Neat trick!

Now if you only have a minor ankle sprain you don’t have to go into the pool to exercise. You will want to stay initially with bilateral movements that minimize eversion or inversion of the foot. Avoid forcing range of motion. Stability seems to be the key. Pain should be the guidance and you want to progress to range of motion exercises as quickly as possible. Later on it is important to maintain the appropriate range of motion via mobility work.

Training balance as soon as it is painfree can help stabilize the joint against future injuries. Some people question the use of balance boards, bosu balls, etc. with the argument that they defy the argument of specificity. The next step would be the transition from walking to running, lateral movements with stabilization and finally cutting and sport specific exercises. Strength training should be functional and look at the whole body not just the ankle joint. Gait analysis and corrections should be made and progressions should be dependent on owning the movement. Pain should be seen as an indicator to back off.

Take Away

Stage 1

  1. RICE (rest, ice, compression, elevation)
  2. Exercises stressing plantar and dorsiflexion (pointing your foot and pulling the foot back)
  3. Cycling and hand ergometer

Stage 2

  1. Range of motion in all planes
  2. reduce swelling and pain
  3. Balance exercises

Stage 3

  1. Full strength
  2. Full range of motion
  3. Restoration of proprioception
  4. Reintegration into sports

Rehab nowadays does not reduce you to one join anymore, at least it should not. Your training should still be challenging but take into account that your ankle is a problem. Pain is always the guidance. Pain changes movements and innervation patterns. Just because you are able to still do the movement clean with pain, does not mean that the muscle that the integrity of the kinetic chain is still given. Unilateral strength exercises are functional and add stability to your strength training but initially after returning to your strength training you might have to regress back to bilateral work in order to really focus on strength. If you look at the make up of a training session it would look something like this:

  1. Foam Rolling
  2. Mobility work as allowed
  3. Ankle stability training
  4. Strength training
  5. Conditioning

I hope this has been helpful,

Have a great start into the weekend,

Michael


References:
Cressey, Eric (6/23/2014 online) http://www.t-nation.com/training/bosu-ball-the-good-bad-and-ugly/print
Prentice, William E. (2004).  Rehabilitation Techniques for Sports Medicine and Athletic Training
Peterson & Rendström (2001). Verletzungen im Sport. Prävention und Behandlung. 3. Auflage. Deutscher Ärzte-Verlag.

What to do when your knee hurts!

A lot of my personal training clients, myself included have had knee pain at some point and time in their life.

You might remember this nagging pain under the knee cap, maybe off to the side. Some feel it just below the knee or they have problems straightening their leg because the knee feels tight.

The knee is one of the most complex joints in the body. It has many surfaces that glide over each other. It is being held in place by strong ligaments and is stabilized and moved by the muscles of your whole leg. Yep, the whole leg. You might wonder now what youknee_arthroplasty_anatomy01r butt or your calf has to do with the knee but we will get to that in a little bit.

First I need to tell you what this article is NOT, it is not a guide how to treat acute or chronic injuries yourself. First of all, I am not a medical professional, second of all, it would go beyond the scope of this blog. What the blog will do though, is get you a little bit better at understanding your body in order to help you discuss your issue with your fitness or health care professional and understand how your training impacts your knee.

The causes for knee injuries differ widely. Some are caused by an acute injury, like you tripping, someone sliding into you during sports, etc. Others come on chronically due to biomechanical factors which could be habitual, genetic, etc. and some are a combination of the above.
Your training might be able to train up your legs, make them stronger and more injury resistant to acute injuries (see above). Now when it comes to biomechanical problems it gets a little bit more complicated. Here the goal is to correct an underlying issue. Depending on its nature that might not be possible. You might have been born with a severe leg length difference, scoliosis, etc. Factors that we as trainers or health care professional might not be able to correct at all or only minimally.

So what can training do for you?

Young woman having knee pain
Is your knee hurting as well?

A lot of chronic knee issues come from the joint above or below the actual knee. I always tell my clients the following analogy: “If one of two workers goes on vacation, which one is the most likely to complain about it?” The answer is obvious, the one doing all the work. Especially with chronic knee pain we often see that the hip muscles are not able to do their job for various reasons. The hip joint is not properly stabilized or mobile enough which in turn can lead to problems in knees or back.

Bad Movement – No Pain

When a personal training client comes to us, we perform a comprehensive initial consultation to check out their movement patterns, see if pain exists, etc. Occasionally we find dysfunctional movements that do not cause pain. Oftentimes using proper lateralization/regression exercises, we are capable of activating and correcting those movement patterns and prevent an injury from happening.

Pain with Movement

In case we already have an existing pain pattern, we refer the client out to a health care professional we trust, in order to work in tandem on the problem. Together we create a cohesive team dedicated to our client’s well being.

For a long time therapists were focused solely on the muscles surrounding the affected joint. In case of the knee they would work the quads and hamstrings. One of the favorite machines back in the day was the knee extension. Extensive research and a lot of ruined post-patellar cartilage later this machine finds less and less use.

Since then, things have come a long way. Good physical therapists during the rehab phase, and personal trainers and coaches during the reintegration phase, have started to look at the whole kinetic chain. We have realized that we cannot just look at the muscles surrounding an affected joint. Don’t get me wrong those have to be addressed appropriately, but we have to look at what is happening above and below. good hip stabilization, ankle stabilization and movement patterns very much influence the knees.

What does that mean in regards to your training?

Single leg deadlifts, deadlifts, bridges, chop patterns half kneeling or tall kneeling and so many more exercises can be  great tools in your tool box. We have found that when you train a client who has knee pain and stay away from pain causing movements and focus on hip exercises, we often see improvements in their pain and movement patterns, and pain free range of motion.

Despite us not doing any treatment at the hurting location and instead addressing the muscles that were not working properly prior to the injury we were able to help some clients minimize their pain, or eliminate it completely.

So, just because your knee hurts does not mean you cannot train legs. You have to train smarter!

Have an awesome day,

Michael


5 Steps to Transforming Your Lifts Into Greatness

A personal trainer’s rant about technique

I am male personal trainer, which in return means I have an ego when it comes to lifting weights. I like to lift heavy and I want to get better every day. Now, I am not a bodybuilder, I run too much and have a more ectomorph bodytype but I am a multi-discipline athlete who lifts weights 4 days a week, runs 3 days a week and does martial arts 3-4 days a week.[video_player type=”youtube” youtube_auto_play=”Y” youtube_remove_logo=”Y” width=”360″ height=”180″ align=”right” margin_top=”2″ margin_bottom=”20″ border_size=”2″]aHR0cHM6Ly93d3cueW91dHViZS5jb20vd2F0Y2g/dj1QTlpNUlM2cG5xSQ==[/video_player]

I am definitely competitive but what I have seen in gyms, especially under the guidance of “so called personal trainers” is terrible. They have people do “butt to the floor” squats and their client’s form falls apart. A deadlift is performed with no regards to form, and what some people consider a chin up or a pull up I call wildly swinging from a bar and getting up with no regards to shoulder stability and lower back issues. I have included a short two minute video for your amusement. The video of one of our clients below is an example on how to do the same exercise correctly: [video_player type=”youtube” youtube_auto_play=”Y” width=”320″ height=”180″ align=”right” margin_top=”3″ margin_bottom=”20″ border_size=”3″]aHR0cHM6Ly93d3cueW91dHViZS5jb20vd2F0Y2g/dj1xQmJoLUh4N1NNNA==[/video_player]

The forgiving body

When you are younger you can get away with a lot of that crap for quite a while before payback comes and hits you square in the head. What is our primary goal as personal trainers or athletes?

Health. Without it I cannot reach my other goals. As a trainer I am responsible for the person in my care. If I want that person to work out for the rest of her/his life, I have to make sure that the body stays healthy!

There is no point in having a personal record one week when the pain resulting from it puts me or my client out of commission for two weeks or longer.

5 Action Steps To Lifelong Performance

  1. Learn a movement first before you start loading it up. Use a coach or a reputable personal trainer. It does not matter if we talk about lifting weights, running, swimming, or golf. You need to have the necessary skill set.
  2. Use a spotter frequently and have them tape you. Compare your form with athletes that know what they are doing.
  3. Instead of muscle failure go for technical failure. The moment you cannot do a squat, bench press, push up, etc. with good form your muscles have failed even though you might be able to muscle the weight up.
  4. Pain is your body’s signal that something is wrong. You should not be in pain, not during a workout or afterward. You might be sore but pain should never be the case. If you have pain you did something wrong, or your body is structurally not made to perform this particular exercise especially if you have a pre-existing medical history.
  5. Reality check –  I am working out alone. I often don’t have a spotter. Each training I am asking myself: Am I doing this correctly? Do I use the correct form, full range of movement? Am I taking shortcuts in order to lift heavier, run further or faster? Sometimes that answer is yes! I go down in weight (A real woman or man is capable of going down in weight!), distance or speed. I have to readjust and work on my technique again.

I hope these 5 tips will help you be the best you can be in your training! I want you to perform at your best, so you can be your best!

Let me know if you need help with your weight training,


Michael


Exercise, fitness and work can be a pain in the a… i mean neck!

Check this out. I talked to my friend the chiropractor Markus Schuster next door. As a personal trainer I  have been working with him and some of his clients for the past year and have to say we had some awesome results.

The reason I am posting this today is that I had a whole bunch of “desk warriors” and “travel champions” come in lately with severe neck issues that were relentless. As much as I would like to think that I can fix it all, it is sadly not true. Markus has done an incredible job at helping some of my clients.

This video is just an introduction and depending on the feedback we will add a mini series every two weeks or so dealing with specific issues and how YOU can deal with it to avoid getting bigger problems.

If you need to contact Markus for help you can get in touch with him here

4832 Park Road, Suite J,
Charlotte, NC 28209
drs@schusterchiropractic.org

No Pain, No Gain Philosophy and other crap in the training industry

In my experience as a personal trainer over the last 12 years  I have seen quite a lot of BS and one of it is that something has to hurt before it gets stronger. The best example was this dude how was doing biceps curls with a barbell. His form was beyond horrible besides the fact that the barbell is not made for curls. The back arched with each repetition as he jerked up the weight. He confirmed that he had back pain and I suggested some modifications. He just shook his head and said he needed it. Hearing that I just shook mine and walked away. You can only lead a horse to water but not make it drink.

Here are some simple rules of avoiding injury while training:

  1. make sure your gym maintains the equipment properly. Slipping belts on treadmills, broken cables, loose DB weights are an indicator of bed maintenance.
  2. Warm up, it does only take a couple of min. Do a warm up set before lifting if you have the time. It will prepare you better and get you in the right frame of mind.
  3. Thinking that more is better, think again. Going really hard in one training and then not being able to go again for a week is not the optimum.
  4. If you just started out, don’t go all out, and for your own sake don’t copy the meatheads at the gym or your fitness magazine, it is a recipy for disaster.
  5. Free weights are fantastic tool but only use them if you know the proper form. Ask your personal trainer or strength coach for help
  6. Help others, receive help. If you know that an exercise is pushing you to the max, get someone to spot you. It will keep you safe.
  7. Are you just working on your thighs and butt or just your chest and upper body? Newsflash, no one likes a toned butt and flabby arms or a toned chest and upper body and legs that you can sue for lack of support. Balance is the key. A body that is not trained balanced will lead to injury.
  8. A good personal trainer can really help you with your form. Even if you don’t want to train with a trainer or can afford one for longer. Take the time to ask them about form. It will really help you.

Alright guys,

have a great workout.

Michael

Seraphinite AcceleratorOptimized by Seraphinite Accelerator
Turns on site high speed to be attractive for people and search engines.